Setup - Moving from Poser's Library to Advanced Library
This page will show you how Advanced Library's Categories work and how they relate to Poser's Library structure.
This is done via a simple example setup.
One possible way you may have your files organized
I've used DAZ's free Aiko 3 LE for the following example.
On the left hand side you can see the default folder structure shown in Windows Explorer after the installation of Aiko 3 LE and on the right one of the many possibilities to organize the files:


As you can see, I did the following:
In Character: I renamed the folder "DAZ Aiko 3" to "Aiko 3"
In Hair: I created an "Aiko 3" folder and within that i created a "Hair" folder and moved the "DAZ Hair" folder indside it, after i renamed it to "Nyoko Hair" (as this hair is inside that folder).
In Pose: I created an "Aiko 3" folder and within that i created a "Body Mats" folder (for all those material pose files for Aiko's body), created "Hair" and "Poses" folders, too. Then i moved the existing folders into those folders.
You may organize your content differently, this is just one of the many possibilities to demonstrate how Advanced Library works.
Setting up Advanced Library
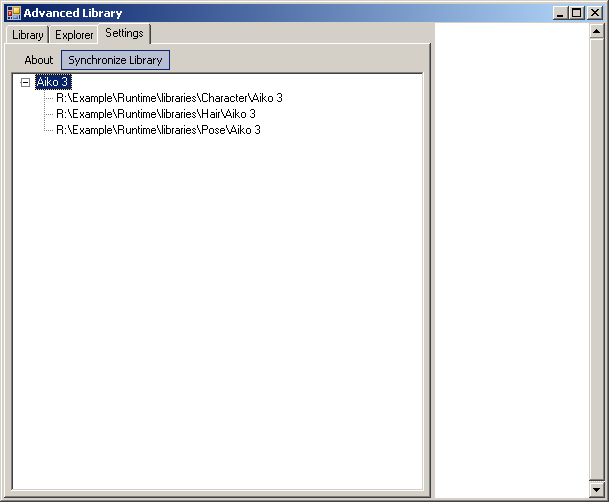
Launch Advanced Library and switch to the Settings Tab.
Right click to open the context menu and add a new category.

A new entry named "new Category" will be added. Click on it to edit its name.

I changed the name to "Aiko 3".

Now it's time to open up Windows Explorer or switch to the Explorer Tab and add the "Aiko 3" folders from the Character, Hair and Pose library created above.
You can just drag the folder over from Windows Explorer (drop them onto the created categorie). The other option is to use the built in explorer from the Explorer tab. You'll then have to select the "Aiko 3" folder on the settings tab and on the Explorer Tab right click the folder and select "Add to library".
The last thing to do is to press "Synchronize Library" - this is needed after every installation of files, as the directory structure is cached for faster browsing the library later. Setup is done now (as there's not more in the example library ;-)). Let's switch to the Library Tab

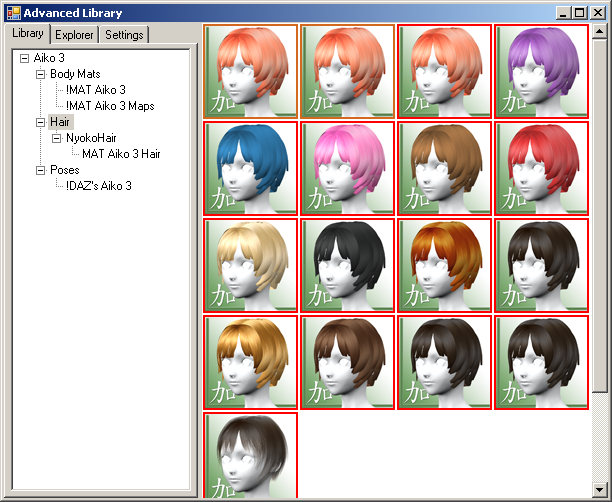
Selecting the Aiko 3 folder and having automatic subdirectory browsing enabled, you'll get the poser files shown above displayed.
The first one with the black border is the "!Aiko 3 LE.cr2" from Poser's Character library.
The next few with the red border are the poses from the "Body Mats" folder.
And the last we can see are the files from the Hair and the Pose Library.
Here's the content of only the Hair folder:
As you can see what the library navigation on the left shows as "Aiko 3\Hair\NyokoHair" is actually content from two different folders from Posers Library/the file system ("Hair\Aiko 3\Hair\NyokoHair\" and "Pose\Aiko 3\Hair\NyokoHair\").
Folders with the same name from all locations you've choosen in the setup will get merged into one flat view on these folders and their files. (This of course applies to all subfolder of those folders, too.)

The red lines show the setup from the settings tab above.
The blue lines the resulting entry "NyokoHair" that actually contains the files from the "NyokoHair" folders from Poser's Hair and Pose Library.